Procedures for Preservation Matting
This example uses two front mats, a back mat, and a backing board. All should be acid-free, pH neutral and lignin free. Cotton mat boards are available at most art supply stores and meet all of those requirements.
If possible, use mats that are colorfast. These will fade less over time than non-colorfast ones and will bleed less if they get wet.
First, cut all the mats to size to fit into the rabbet of the frame. If the frame comes with a backing, it can be used as a pattern to cut the mats. Cut the mats to fit snugly, but not too tightly, into the rabbet of the frame.
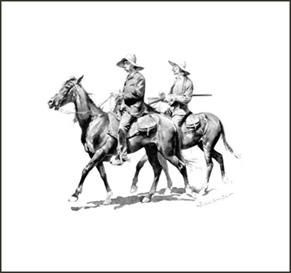
The picture in this example has a broad expanse of white surrounding the center art.
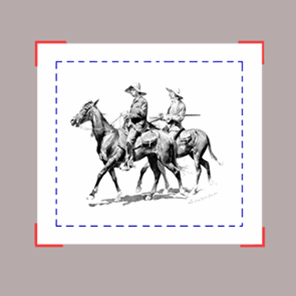
Place the picture on the back mat – grey in this example.
Mark directly on the back mat where the picture will be placed - the red lines in this example.
Do not attach the picture to the back mat yet. The windows in both the inner and outer front mats will be cut in conjunction with the precise positioning of the picture.

When measuring for the window of the inner front mat, keep in mind that each edge of the window will cover each edge of the art to hold it flat and in place.
Measure from the outside edge of the back mat (grey) past the edge of the art by at least 1/4 of an inch on each side.
The blue dotted line in this example represents the theoretical position of the window of the inner-front mat. Do not actually draw on the art.
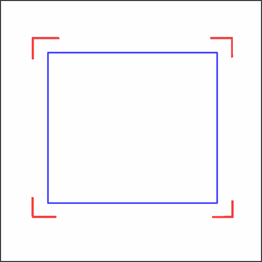
Mark the lines for the window (blue) on the back of the inner front mat – white in this example. The red corner marks are included for reference here.
Cut the window out using a straight edge and utility knife or mat cutter.
Replace the art on the back mat, using the corner marks as a guide. Then place the inner front mat over the art, using the edges of the back mat as a guide. The art should show properly through the window.

To measure the opening for the outer front mat, place the inner front mat on the back side of the outer front mat and trace the outline of the window lightly with a pencil.
Measure an extra 1/4 inch around the outside of the pencil line and use this outside measurement to cut the outer mat window.
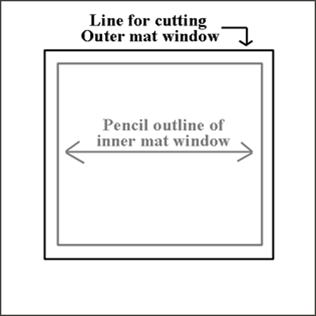
Check the fit of the outer mat window to be sure the art shows properly and make any necessary changes before proceeding.

Attach the art to the back mat by hinging it with linen tape or kizukishi and wheat starch paste, or by using photograph corners (shown below).
Photo corners work best for photographs, for artwork on stiff paper, and for encapsulated items.
Hinge the inner front mat to the back mat. Linen tape is suitable for this. Be sure the tape does not touch the art.
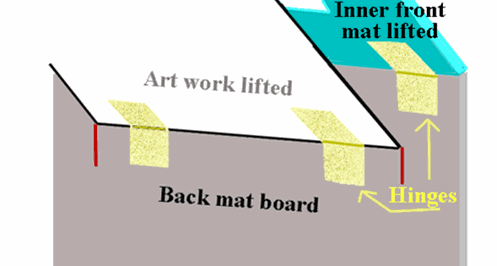
Be sure none of the photo corners show through the window of the front mat.
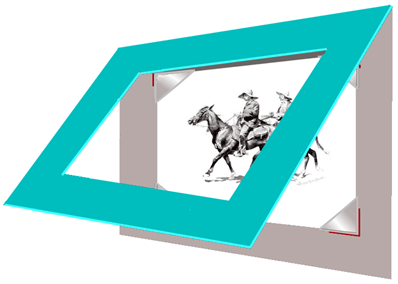
Fit the entire mat packet and the front mat into the rabbet area of the frame. The glazing and the mat packet should fit snugly into the rabbet area of the frame’s window without any bending of the mats. It also should not have too much room to slide around.

Place the backing behind the entire mat packet and fasten it into place with the brads, strips, locking devices or other method used to keep the mats in place in the frame.
If you are using a point driver, shoot the points parallel to the backing, straight into the wood of the rabbet. Do not shoot through the backing.
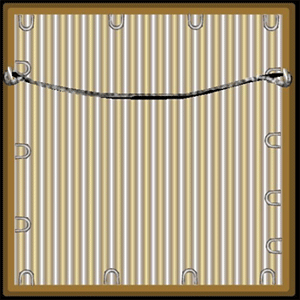
Add a hanging wire. Some frames come with wire attachment points. For those that do not, be sure to attach the wire to the frame itself, rather than to the backing or a brad. Eye screws work well with wood frames.